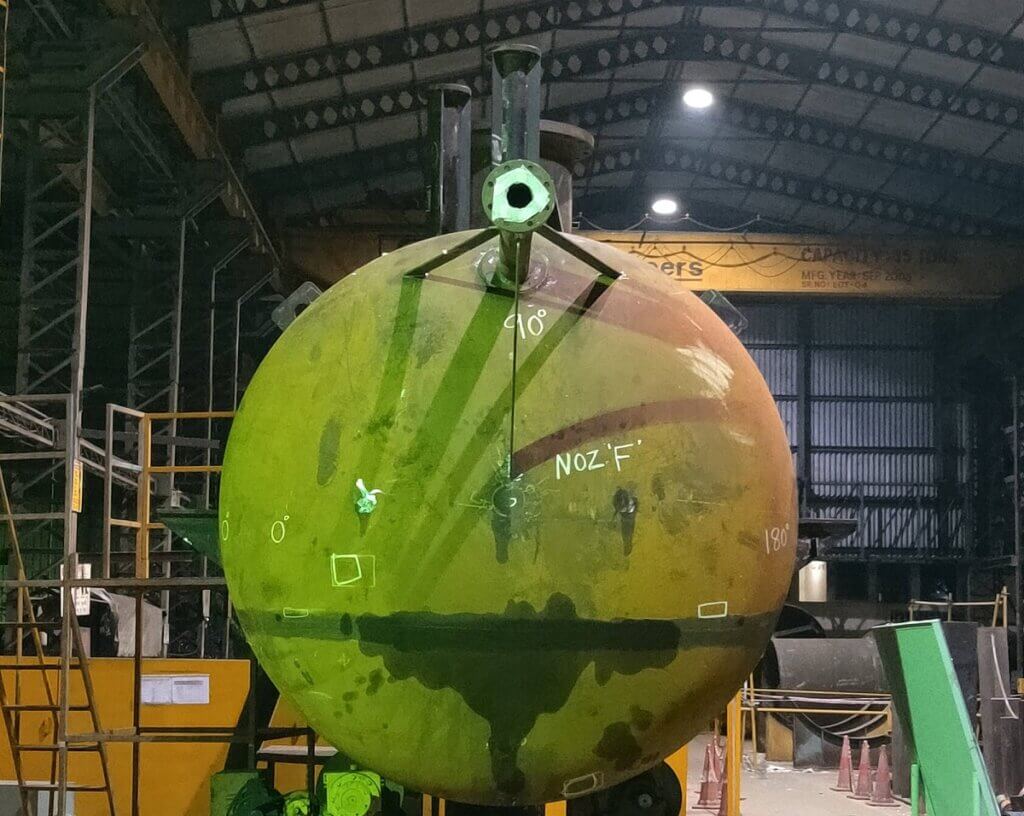
Visual Inspection (VT) procedure to confirm that there are no material or dimensional defects in (BPVC)pressure vessel welds. Visual testing should be the first non-destructive test method applied to an item in order to locate surface anomalies in most materials and subsurface discontinuities in translucent materials. It is widely used on a variety of objects to detect surface discontinuities associated with various Structural failure mechanisms. Even when other nondestructive tests are performed, visual tests often provide a useful supplement.
Visual examination is a nondestructive examination method used to evaluate an item by observation, such as the correct assembly, surface conditions, or cleanliness of materials, parts, and components used in the fabrication and construction of ASME Code vessels and hardware. Visual examination is generally used to determine such things as the surface condition of the part, alignment of mating surfaces, shape, or evidence of leaking. In addition, visual examination is used to determine a composite material’s (translucent laminate) subsurface conditions.
To learn more about Visual Testing ,Read : INTRODUCTION TO VISUAL TESTING
Scope
This procedure defines the method of visual examination of materials and welds used in Pressure Vessels to confirm that there are no material or dimensional defects
Definitions:
- auxiliary lighting: an artificial light source used as a visual aid to improve viewing conditions and visual perception.
- direct visual examination: a visual examination technique performed by eye and without any visual aids (excluding light source, mirrors, and/or corrective lenses), e.g., magnifying aids, borescopes, video probes, fiber optics, etc.
- surface glare: reflections of artificial light that interfere with visual examination.
PERSONNEL REQUIREMENTS:
Personnel who perform the Visual Examinations shall be qualified and certified for visual Testing in accordance With a program established by the employer of the personnel being certified, which shall be based on Minimum requirements ASME Sec – V Article 9, ASME Sec-VIII Div-I, ASNT SNT TC-1A(2016 Edition)/ ASNT CP 189(2016 Edition).
Personnel shall have an annual vision test to assure natural or corrected near distance acuity such that they are capable of reading standard J-1 letters on standard Jaeger test type charts for near vision. Equivalent near vision tests are acceptable.
EQUIPMENT
Equipment used for visual examination shall include
- Measuring instruments and gauges
- Templates for measuring Edge preparation and fillet welds
- Spirit levels
- Magnifying lenses and Mirrors
- Shims
- Plumb
Note: calibrated instruments shall be used for examination for better reliability of results.
TECHNIQUE
Direct visual examination shall be used.
Direct visual examination may usually be made when access is sufficient to place the eye within 24 in. (600 mm) of the surface to be examined and at an angle not less than 30 deg to the surface to be examined. Mirrors may be used to improve the angle of vision, and aids such as a magnifying lens may be used to assist examinations. Illumination (natural or supplemental white light) of the examination surface is required for the specific part, component, vessel, or section thereof being examined.
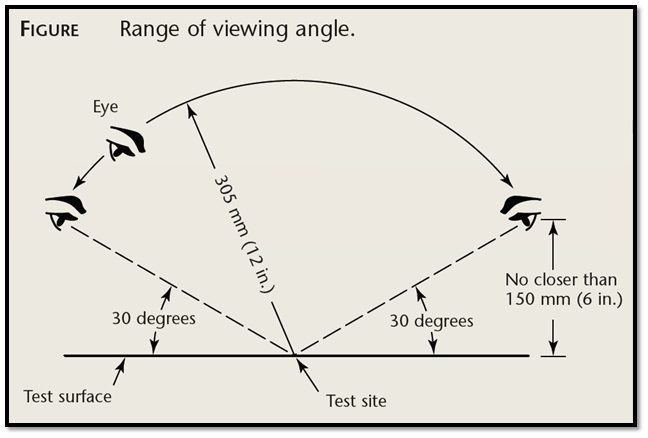
Credit : ASNT VT Handbook
The minimum light intensity shall be 100 fc (1076 lx). The light intensity, natural or supplemental white light source, shall be measured with a white light meter prior to the examination or a verified light source shall be used. Verification of light sources is required to be demonstrated only one time, documented, and maintained on file.
LIGHT METER CALIBRATION
Light meters shall be calibrated at least once a year or whenever they have been repaired. If meters have not been in use for 1 yr or more, they shall be calibrated before they are used.
SURFACE CONDITION
- Cleaning of obstructions from the surface: Pre-cleaning is necessary because a dirty surface weakens an adequate view of the test surface. The need for cleaning largely depends on the size and type of discontinuities specified by acceptance criteria.
- The surfaces to be welded shall be clean and free of scale, rust, oil, grease, slag, detrimental oxides, and other deleterious foreign material.
- When plates are shaped by oxygen or arc cutting, the edges to be welded shall be uniform and smooth and shall be freed of all loose scale and slag accumulations before welding.
- Butt-welded joints shall have complete penetration and full fusion. The surface of the fillet weld shall merge smoothly with the surfaces joined.
- As‐welded surfaces are permitted; however, the surface of welds shall be sufficiently free from coarse ripples, grooves, overlaps, and abrupt ridges and valleys to permit proper interpretation of radiographic and other required non-destructive examinations.
METHOD OF EXAMINATION
- The material specification and dimensions shall be verified based on applicable drawings.
- Weld surface(s) shall be verified for the finish and cleanliness.
- Edge preparation and weld fit up shall be verified with respect to the applicable drawing & WPS.
- Fit up alignment shall be verified using steel rules and spirit level.
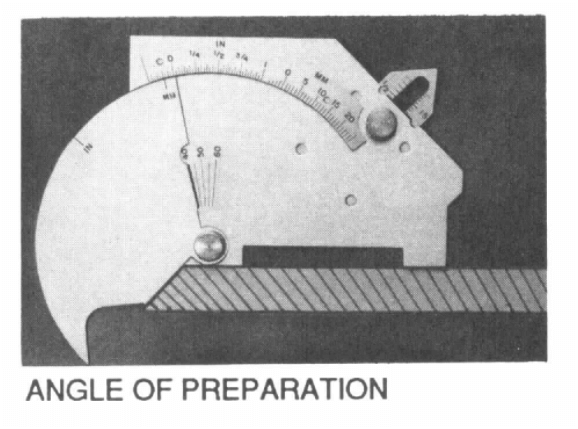
- Groove angle and root gap shall be verified using templates/gauges.
- Employment of qualified welder and usage of correct welding consumables shall be verified with ‘List of Qualified Welders’ and WPS.
- Cleanliness of Inside bores shall be inspected using a hand lamp or Torchlight meeting minimum illumination requirements.
Acceptance Criteria
ALIGNMENT TOLERANCE
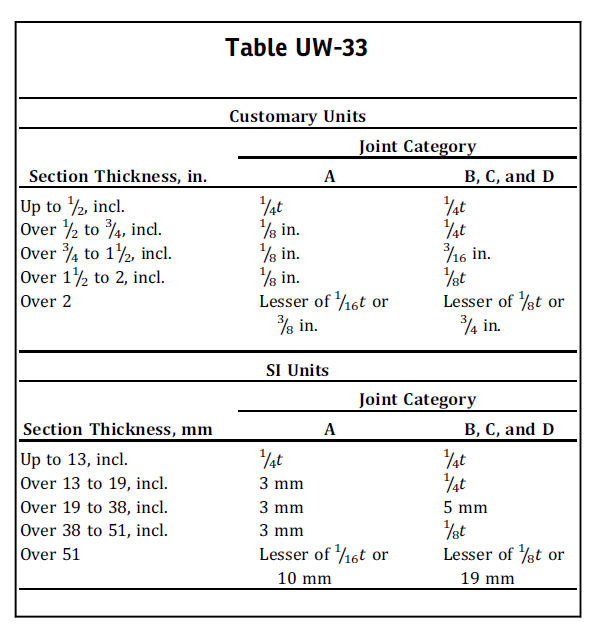
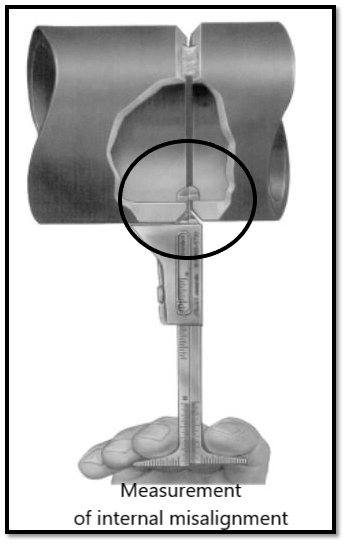
Alignment of sections at edges to be butt welded shall be such that the maximum offset is not greater than the applicable amount for the welded joint category under consideration, as listed in ASME BPVC Sec-VIII Div-I Table UW-33. The section thickness t is the nominal thickness of the thinner section at the joint.
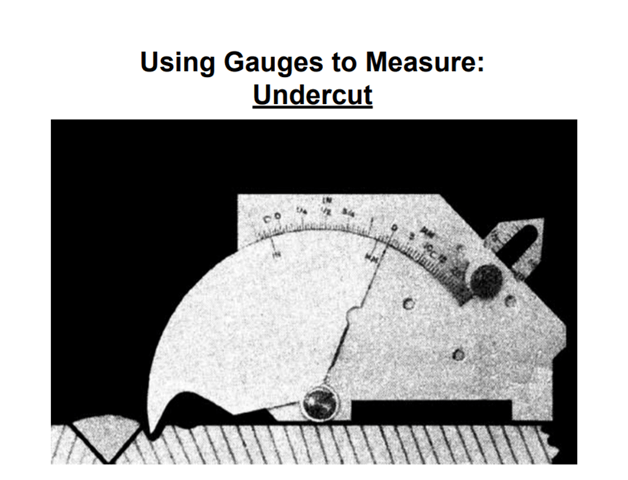
(b) A reduction in thickness due to the welding process is acceptable provided all of the following conditions are met:
(1) The reduction in thickness shall not reduce the material of the adjoining surfaces below the design thickness at any point.
(2) The reduction in thickness shall not exceed 1/32 in. (1 mm) or 10% of the nominal thickness of the adjoining surface, whichever is less.
Note: It is not the intent of this paragraph to require measurement of reductions in thickness due to the welding process. If a disagreement between the Manufacturer and the Inspector exists as to the acceptability of any reduction in thickness, the depth shall be verified by actual measurement.
WELD REINFORCEMENTS
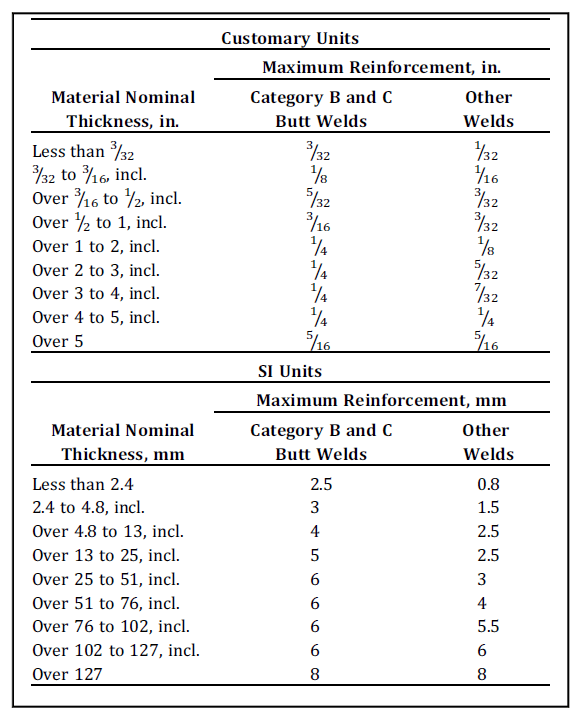
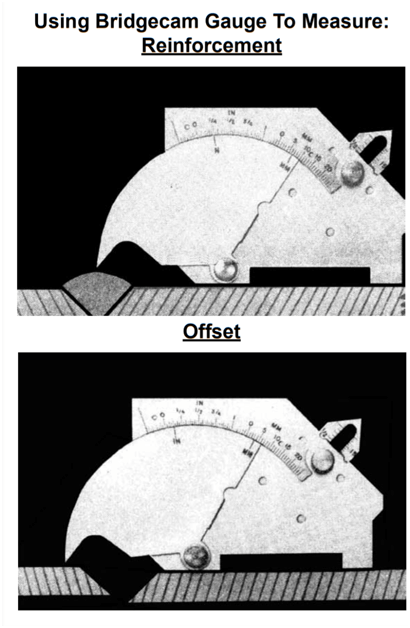
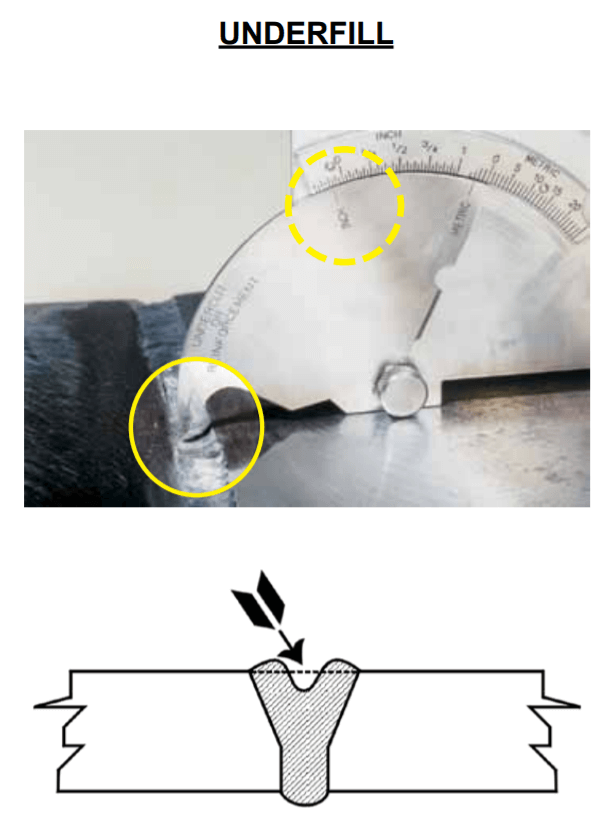
To assure that the weld grooves are completely filled so that the surface of the weld metal at any point does not fall below the surface of the adjoining base materials, weld metal may be added as reinforcement on each face of the weld. The thickness of the weld reinforcement on each face shall not exceed the following:
Concavity due to the welding process on the root side of a single-welded circumferential butt weld is permitted when the resulting thickness of the weld is at least equal to the thickness of the thinner member of the two sections being joined and the contour of the concavity is smooth.
FILLET WELDS
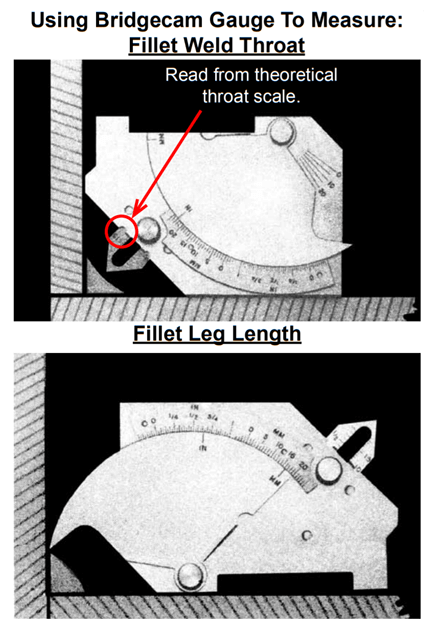
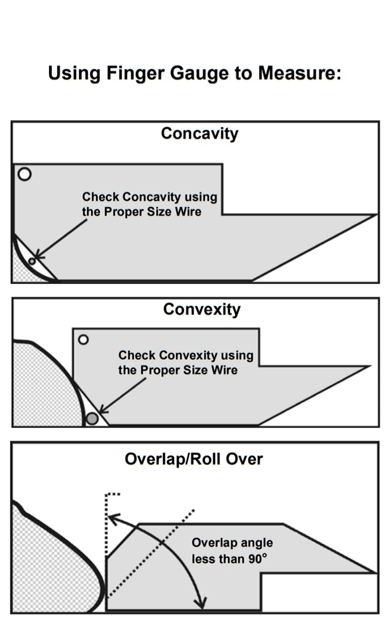
In making fillet welds, the weld metal shall be deposited in such a way that adequate penetration into the base metal at the root of the weld is secured. The reduction of the thickness of the base metal due to the welding process at the edges of the fillet weld shall meet the same requirements as for butt welds. Fillet welds shall be verified using fillet gauges.
REPORT OF EXAMINATION
A written report of the examination shall contain the following information:
- the date of the examination
- procedure identification and revision used
- technique used
- results of the examination
- examination personnel identity, qualification level
- identification of the part or component examined
- all observation and dimensional checks (specified by ASME Sec- VIII Div – I)
REFERENCES:
- ASME BPVC Sec- V, Article-9
- ASME Sec- VIII Div-I
- ASNT NDT visual testing handbook
- WELDER’S Visual Inspection HANDBOOK May 2013
