All objects emit electromagnetic radiation of a wavelength-dependent on the object’s temperature. The wavelength of the radiation is inversely proportional to the temperature. Infrared and thermal testing involves temperature and heat flow measurement to predict or diagnose the failure. This may involve contact or non-contact devices or a combination of both. Infrared thermography is the non-destructive, nonintrusive, noncontact mapping of thermal patterns on the surface of objects. it is the science of measuring and mapping surface temperatures. Infrared and thermal testing is one of many non-destructive testing techniques designated by the American Society for Nondestructive Testing (ASNT). Here in this article, we will have an introduction to IR(Infrared) & Thermal Testing.
To learn about history of basic NDT methods read our blog: HISTORY OF NON-DESTRUCTIVE TESTING(NDT)
To learn about how to become an NDT Personnel read our blog: BEGINNERS GUIDE TO NON-DESTRUCTIVE TESTING (NDT) – UPDATED 2020
What is infrared :
Infrared (IR), is electromagnetic radiation (EMR) with wavelengths longer than those of visible light. In an Electromagnetic spectrum, Infrared radiation extends from the nominal red edge of the visible spectrum at 700 nanometers (nm) to 1 millimeter (mm). This range of wavelengths corresponds to a frequency range of approximately 430 THz down to 300 GHz.
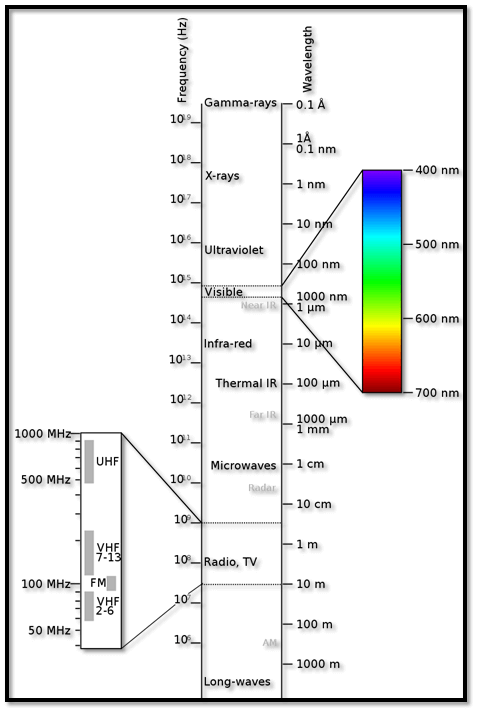
By! Original: Penubag Vector: Victor Blacus –
Own work based on: Electromagnetic-Spectrum.png, CC BY-SA 3.0, https://commons.wikimedia.org/w/index.php?curid=22428451
General
thermography, infrared is the process of displaying variations of apparent temperature (variations of temperature or emissivity, or both) over the surface of an object or a scene by measuring variations in infrared radiance.
There are two basic types of thermography; passive thermography and active thermography
- passive thermography: refers to examination of an object or system during its normal operational mode, without the application of any additional energy source for the express purpose of generating a thermal gradient in the object or system;
- active thermography: refers to the examination of an object upon the intentional application of an external energy source. The energy source (active or passive) may be a source of heat, mechanical energy (vibration or fatigue testing), electrical current, or any other form of energy.
System Components
An infrared thermographic scanning system can measure and view temperature patterns based upon temperature differences as small as a few hundredths of a degree Celsius.
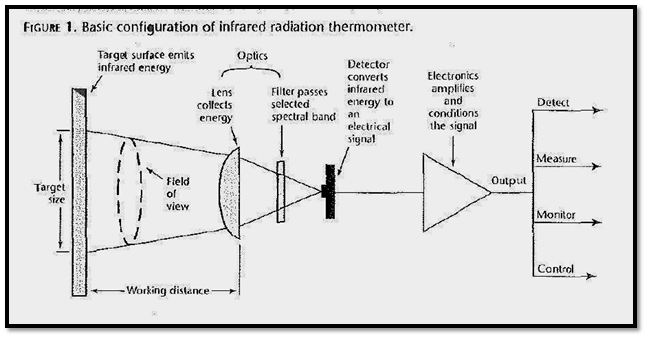
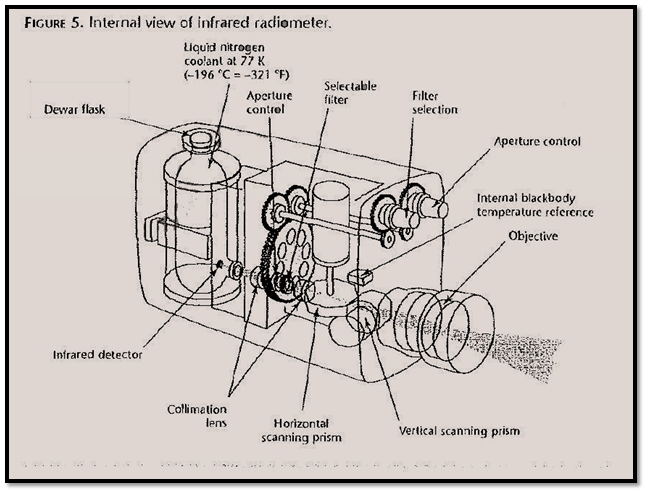
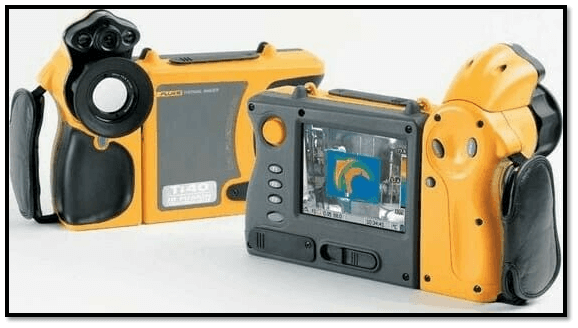
In infrared thermography, the radiation is detected and measured with infrared imagers (radiometers). The imagers contain an infrared detector that converts the emitting radiation into electrical signals that are displayed on a color or black and white computer display monitor. In thermal detectors, the incident radiation heats the surface. This heating affects properties of the heated material such as electrical conductivity, which in turn causes the signal output to vary.
Types of Detectors :
- Pyroelectric detectors
- Photonic Detectors
- Photoemissive Photonic Detectors
- Quantum detectors
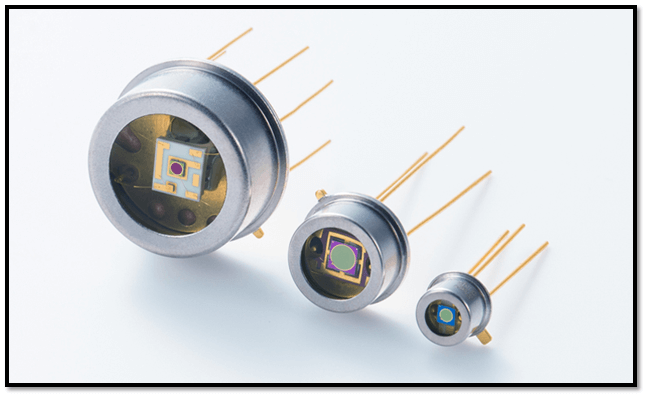
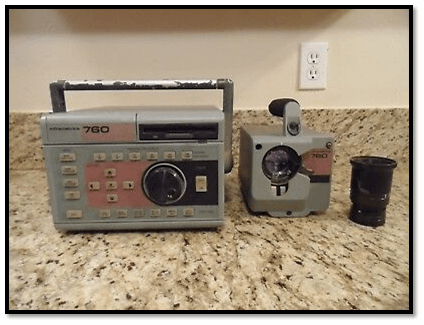
infrared sensing device—one of a wide class of instruments used to display or record, or both information related to the thermal radiation received from any object surfaces viewed by the instrument. The instrument varies in complexity from spot radiometers to two-dimensional real-time imaging systems.
infrared imaging system—an apparatus that converts the two-dimensional spatial variations in infrared radiance from any object surface into a two-dimensional thermogram of the same scene, in which variations in radiance are displayed in gradations of gray tone or in color.
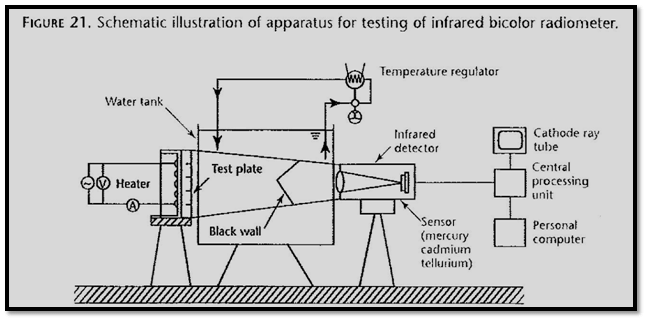
radiometer—an instrument for measuring the intensity of radiant energy. In infrared thermography, an apparatus that measures the average apparent temperature of the surface subtended by its field of view.
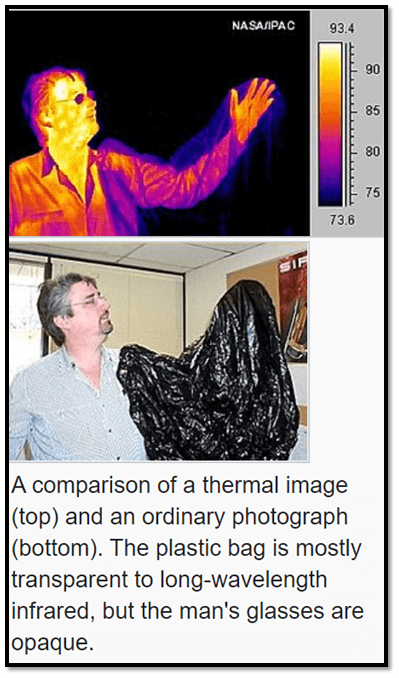
Thermogram
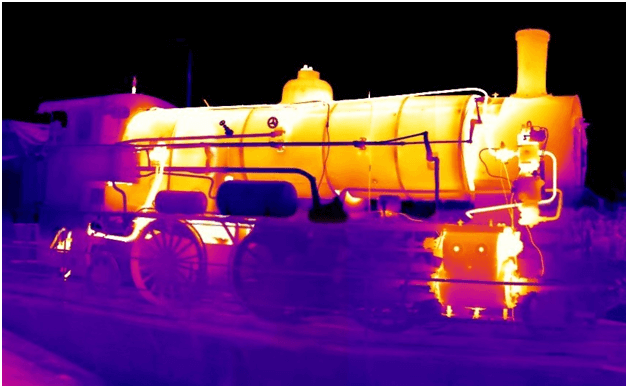
a visual image that maps the apparent temperature pattern of an object or scene into a corresponding contrast or color pattern. It is a recording of the thermal image. The thermogram can be made in the form of a photograph from a camera, recorded on a videotape, or a file on any digital storage medium. The colors visible in the thermogram image are conventionally assigned to the individual temperature values. The thermogram image may also contain isotherms. The thermogram may also take the form of a curve versus time printed on paper by the thermograph.
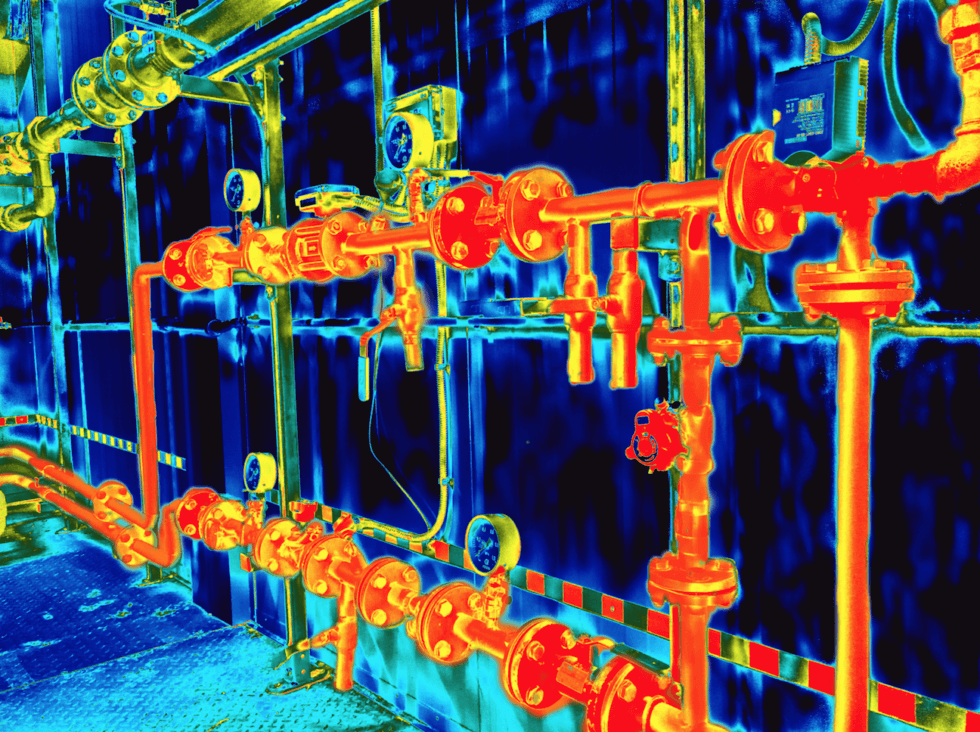
In any thermogram, the brighter colors (red, orange, and yellow) indicate warmer temperatures (more heat and infrared radiation emitted) while the purples and dark blue/black indicate cooler temperatures (less heat and infrared radiation emitted). In this image, the bright yellow area indicates warn regions.
https://commons.wikimedia.org/wiki/File:ParowozIR.jpg#/media/Plik:ParowozIR.jpg
How thermal imaging works?
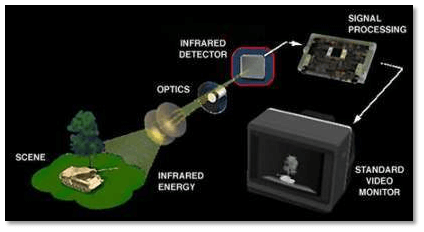
- A special lens focuses the infrared light emitted by all of the objects in view. The focused light is scanned by a phased array of infrared-detector elements.
- The detector elements create a very detailed temperature pattern called a thermogram.
- The thermogram created by the detector elements is translated into electric impulses.
- The impulses are sent to a signal-processing unit, a circuit board with a dedicated chip that translates the information from the elements into data for the display.
- The signal-processing unit sends the information to the display, where it appears in various colors depending on the intensity of the infrared emission. The combination of all the impulses from all of the elements creates the image.
Test specifications for IR and thermal testing
A thermographic specification must anticipate a number of issues that arise during testing.
Test condition requirements –
- The heat stimulation requirements (energy and duration) to detect the target discontinuities must be determined.
- The required heating rate depends on the thermal and surface process and efficiency and on equipment characteristics such as speed and sensitivity.
- The inspector needs to know whether a stripplable paint or coating is needed because of the low emissivity of the test surface. Whether the customer will allow a coating?
- The profile of time versus temperature required to reveal the target discontinuities must be determined.
Emissivity is defined as the ratio of the energy radiated from a material’s surface to that radiated from a perfect emitter, known as a blackbody, at the same temperature and wavelength and under the same viewing conditions. It is a dimensionless number between 0 (for a perfect reflector) and 1 (for a perfect emitter).
Selection on Heat source
- Issues include portability, accessibility, cost, availability, power requirements, safety, and heating requirements.
- If the optimum heat source is neither particle nor available, determine an alternative.
- Does the application require testing from one side or from two sides?
Selection of Detector:
Technical specifications for the detector include noise equivalent temperature differential, scan rate, field of view, and standoff, specifications must be made for the imaging system if used and for detection algorithms if the detection process is automated.
Mechanical Considerations:
- The best positions for recording devices, monitors, electrical connections, and personnel need to be determined.
- Fixturing may be needed to support the heat source, camera, or other equipment.
- Camera positioning may be determined by distance, fixturing, lens choice, and spatial or thermal resolution required to detect the target discontinuities.
Interpretation:
Interpretation can be complex because of the presence of unknown materials (inserts, repairs) or time-dependent contrast reversal because of thermal capacitance (mass) or other thermal property interactions. Discontinuities may be detected primarily through pattern recognition or image interpretation by an experienced operator. Beware of the possibility of false or missed discontinuity findings caused by reflections and emissivity variations (spatial or because of viewing angle) ; by surface curvature, viewing angle, or field of view; or by environmental interference with the heat pulse from wind, sunlight, moisture or personnel.
Standards and specifications for infrared and thermal Testing:
Standards and specifications exist in three basic areas :
- Equipment: standards for equipment and materials include electronic and optical equipment. standardized reference objects such as blackbodies would also fit in this category.
- Processes and personnel: the American society for testing and materials and other organizations publish standards for test techniques. Other standards are for quality assurance procedures and are not specific to a test method or even to inspection in general.
- Personnel: the American society for nondestructive testing(ASNT) has been a world leader in the qualification and certification of nondestructive testing personnel for many years.
Applications
Infrared thermography, a nondestructive, remote sensing technique, has proved to be an effective, convenient, and economical method of testing concrete.
A typical application for regularly available IR Thermographic equipment is looking for “hot spots” in electrical equipment, which illustrates high resistance areas in electrical circuits.
It can detect internal voids, delaminations, and cracks in concrete structures such as bridge decks, highway pavements, garage floors, parking lot pavements, and building walls, locating loose electrical connections, failing transformers, improper bushing and bearing lubrication, overloaded motors or pumps, coupling misalignment, and other applications where a change in temperature will indicate an undesirable condition.
As a testing technique, some of its most important qualities are that
- it is accurate;
- it is repeatable;
- it need not inconvenience the public; and
- it is economical.”
References:
- en.wikipedia.org
- ASME BPVC Sec-V ARTICLE 30, SE-1316
- NDT Hand Book Infrared and Thermal Testing.
- https://www.nde-ed.org/
- https://beyondpenguins.ehe.osu.edu/issue/keeping-warm/seeing-temperature-through-color#:~:text=In%20any%20thermogram%2C%20the%20brighter,area%20indicates%20the%20electrical%20fault.
- Feature image: https://theramreview.com/9-steps-toward-an-effective-ir-inspection-program/
- https://ieee.nitk.ac.in/blog/thermal-imaging/
- https://electronics.howstuffworks.com/gadgets/high-tech-gadgets/nightvision.htm
- https://www.npl.co.uk/
Awesome post, thanks for sharing.