Introduction:
Ultrasonic testing (UT) is a family of non-destructive testing techniques based on the propagation of ultrasonic waves in the object or material tested. In most common UT applications, very short ultrasonic pulse-waves with center frequencies ranging from 0.1-15 MHz, and occasionally up to 50 MHz, are transmitted into materials to detect internal flaws or to characterize materials.
Ultrasonic Testing Terms:
Sound is basically vibrations of atoms or particles traveling in a medium.
Frequency (f) of sound means the number of vibration cycles per second. Unit: Hertz (Hz)
Velocity (V) of Sound is given by distance traveled by the time taken
Sound vibrations having a frequency between 20 to 20,000 Hz is called audible sound waves and can be heard by humans.
Ultrasound is sound waves having frequency more than 20,000 Hz and can’t be heard by humans. Ultrasonic is a study and application of ultrasound and Ultrasonic testing means testing of materials using Ultrasound.
Types of Ultrasonic waves :
- Longitudinal waves or Compression Waves: Propagation of waves in a straight direction. They Propagate in solid, liquid and gas.
- Transverse Waves or Shear Waves: particle vibrations are at a right angle to the direction of wave propagation. Propagates in solid only. These waves have a velocity approximate 50% of longitudinal waves.
- Surface Wave or Rayleigh Waves: these waves propagate region lesser than one wavelength beneath the surface of material following an elliptical orbit having velocity 90% compared to transverse waves. Such waves propagate only in Solids.
- Lamb Wave or Plate wave: travels in a solid material having a thickness equal to or less than its three-wavelength.
Basic Components of Ultrasonic Test Equipment.
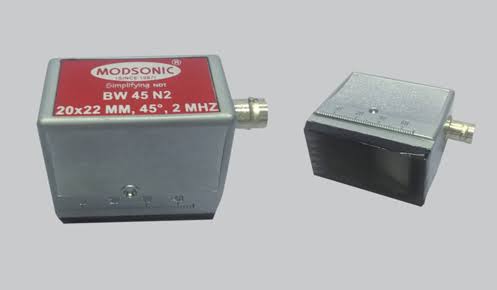
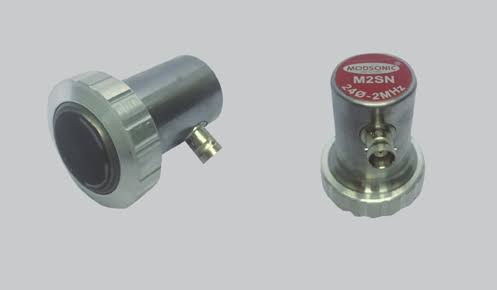
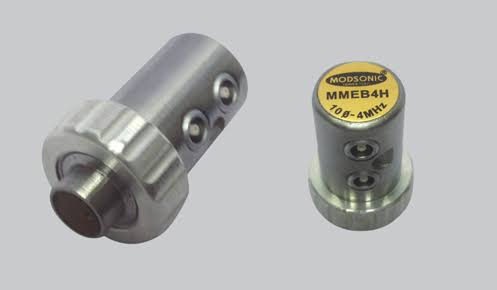
Probe or Transducer: converts electric energy into ultrasound energy and vice versa utilizing a phenomenon known as the piezoelectric effect. Some naturally occurring piezoelectric materials are quartz, tourmaline, lithium sulfate, cadmium sulfide, and zinc oxide.
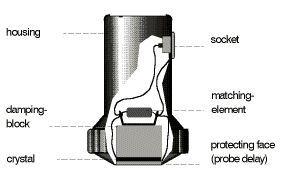
Basic types of Probe -:

Angle Probe(emits Transverse waves) 
Normal Probe(emits Longitudinal Waves) 
TR (Transmitter receiver Probe)
Couplant: It is used to eliminate air between the probe and the specimen surface used in liquid or paste form. commonly used couplants are glycerin, water, oils, petroleum greases, silicone greases, etc.
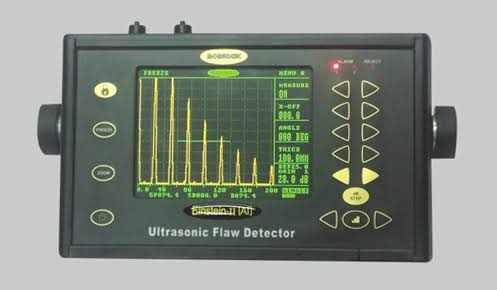
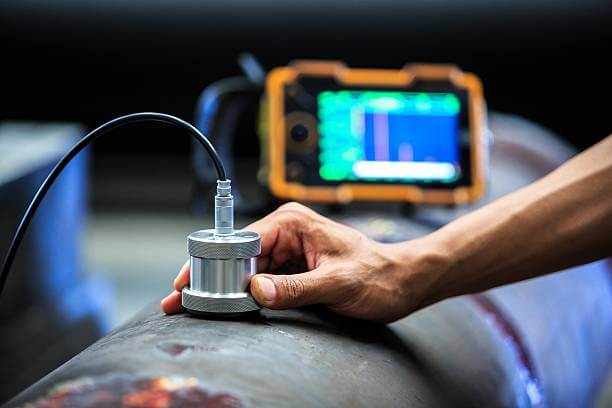
Ultrasonic flaw detector (UFD): It is the main controller of the whole testing process it activates the transducer using pulse control. Receives reflected waves from the material and converts received vibrations in echo using sweep control and Display unit. Hence making it possible to inspect the material soundness.
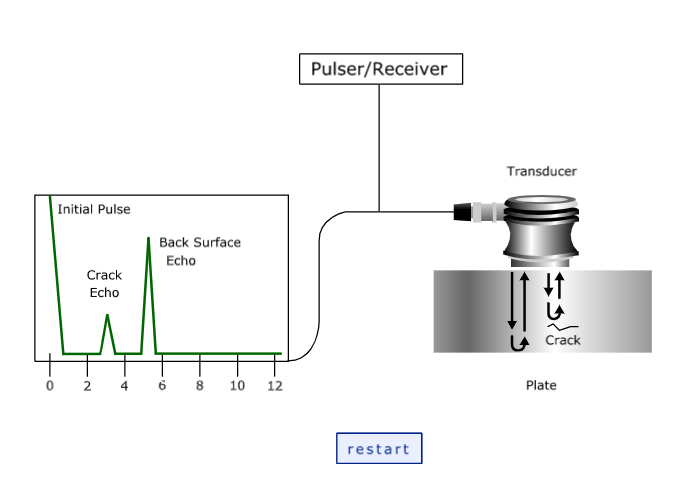
How it works
When the transducer is in contact with the test piece with no air gap between the UFD shows Initial and back wall echo. Now on scanning the test piece using a probe , when the probe comes over a discontinuity a separate echo appears in between Initial echo and Back wall echo causing the back wall echo to reduce in amplitude or diminish completely indicating the presence of a discontinuity.
Applications of Ultrasonic Testing:
Used to detect inherent, processing, service discontinuities in metals, nonmetals, ceramics, and plastics.

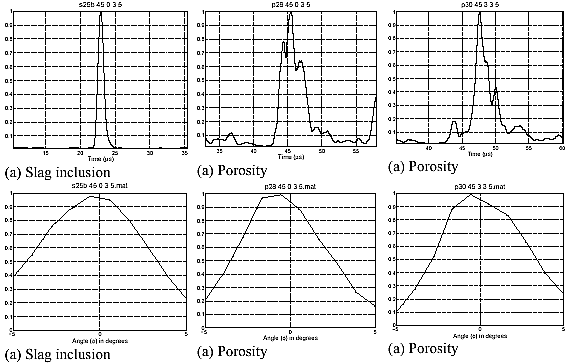
- Laminations, stringers, seams in Forgings,
- Slag, porosity, lack of fusion and penetration in welds,
- Inclusions, Shrinkages, Gas in castings,
Some of the advantages of ultrasonic inspection include:
- It is a volumetric testing method means it is able to detect both surface and subsurface discontinuities.
- flaw detection or measurement is superior to other NDT methods.
- Equipment used for testing is portable and easy to operate in different locations.
- highly accurate in determining discontinuity position and estimating size and shape.
- Minimal part preparation is required.
- It can also be used for the thickness measurement of the specimen.
The ultrasonic inspection also has its limitations, which include:
- Direct contact is required to inspect the test specimen.
- Skill and training are more extensive than with some other methods.
- The coupling medium required.
- Materials that are rough, irregular in shape, very small, exceptionally thin or not homogeneous are difficult to inspect.
- Coarse-grained materials are difficult to inspect due to low sound transmission and high signal noise.
- Linear defects oriented parallel to the sound beam may go undetected.
- Reference standards are required for both equipment calibration and the characterization of flaws
References
- ASNT UT HandBook
- Modsonic.com
- NDT.net
- Researchgate.net
- online-sciences.com
- wikipedia.com
Pingback: Equipment used in Ultrasonic Testing | World Of NDT
*It?s hard to find knowledgeable people on this topic, but you sound like you know what you?re talking about! Thanks
Sir,
We totally agree that not much content is available on these topics on the internet and it is our basic aim to speed knowledge about NDT in people.
We are trained and certified in different NDT methods by competent authorities.
I am really happy to say it’s an interesting
post to read.
Best regards,
Lunding Raahauge
Thank you for your Feedback.
Intriguing post. I Have Been pondering about this issue,
so a debt of appreciation is in order for posting.
Entirely cool post. It ‘s extremely exceptionally decent and Useful post.
Thanks!
Best regards,
Boswell Valenzuela
Really Appreciate your Comment.
Pretty cool post. I stumbled upon your article and wished to say that I’ve really enjoyed reading your article. After all I’ll be subscribing to your rss feed and I hope you write again soon!
Pretty nice post. I just stumbled upon your post and wished to say that I’ve really enjoyed browsing your article. After all I’ll be subscribing to your rss feed and I hope you write again soon!
Wonderful post! We are linking to this article on our website.
Keep up the terrific writing.
King regards,
Thomassen Schneider
cool post. I just stumbled upon your post and wished to say that I’ve really enjoyed reading your blog post. After all I’ll be subscribing to your rss feed and I hope you write again soon!
Wow, wonderful blog structure! How lengthy have you been blogging for? you made running a blog glance easy. The overall glance of your website is fantastic, as neatly as the content!
Appreciate you sharing, great article post.Much thanks again.
Im grateful for the blog.Much thanks again. Keep writing.
Thanks for the terrific information for us.
Best regards,
Harrell Schneider
I always spent my half an hour to read this blog’s posts
all the time along with a mug of coffee.
Pretty section of content. I just stumbled upon your weblog and in accession capital to assert that I get actually
enjoyed account your blog posts. Any way I’ll be subscribing to
your augment and even I achievement you access consistently fast.
Hi there, of course this post is truly nice and I have learned lot of things from
it on the topic of blogging. thanks.
I am eҳtremely inspired along with your writing abilities and also with the ayout for your blog.
Is that tis a paid subjeht or did you customіze it yourself?
Either way stay up the excelleent high quality writing, іt is uncommon too see a nicе weblog liҝe
this one today..
I am so happy I found your blog and I absolutely love your information about introduction to ultrasonic testing! I liked and it is wonderful to know about so many things that are useful for all of us! Thanks a lot for this amazing blog!!Well, I have visited another site Csiscan.nz having some wonderful and similar information.
Pingback: UT - Key formulas | World Of NDT
Pingback: Nondestructive Inspection of Forgings | World Of NDT
Pingback: 【品質保証】プラント機器における非破壊検査の種類と特徴の解説
This page is full of detailed information about ultrasonic testing. It was helpful reading your blog! Great Work!
Pingback: Phased Array Ultrasonic Testing - PAUT - World Of NDT